Appearance
Introduction
When making a mod for Minecraft: Dungeons, it is important to know that most weapons, melee and ranged, are not like items in Java or Bedrock Edition - their model is not generated from their texture, but rather it's made to fit it. This tutorial will show you how to make and render models for your own, custom item textures. Never worked with any 3D modelling software of any kind? Not to worry, this tutorial will show you exactly what to do, without any need for previous 3D modelling knowledge! Let's get started:
Requirements
- Blockbench 3.6.6+
- Blender 2.80+
- Import Unreal Skeletal Mesh add-on for Blender (download below)
- Minecraft: Dungeons default game files
PART 0: Controls & Hotkeys
Blockbench:
 ### Blender:
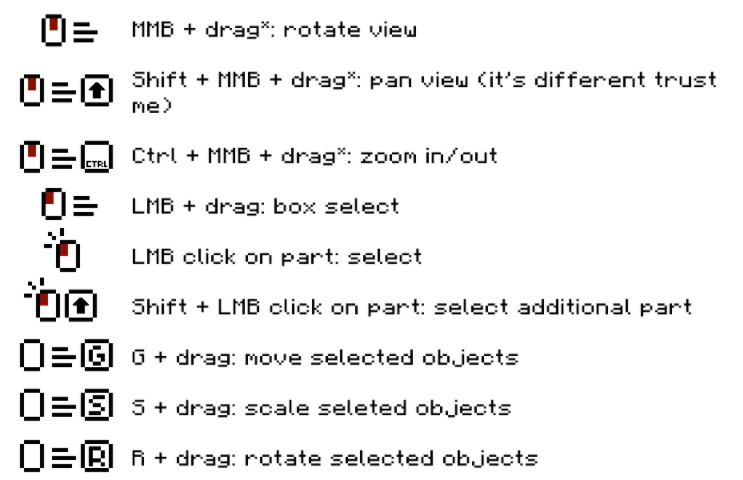
If you are on Mac: use
Cmdinstead ofCtrl
* What if I don't have a 3rd button mouse/numpad?
You can skip this part if you've got a normal keyboard & mouse.
That's no problem! Blender allows you to emulate both of these, allowing you to access the controls you need. Here's how to do it:
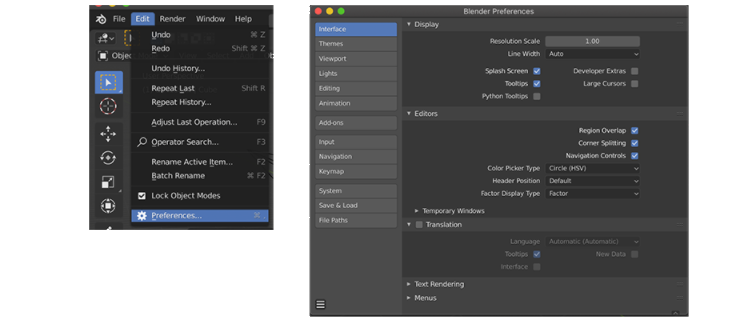
Go to Edit tab up top, then select Preferences. A window should pop up.
In that window, go to the Input tab and check the
Emulate 3 Button MouseandEmulate Numpadboxes.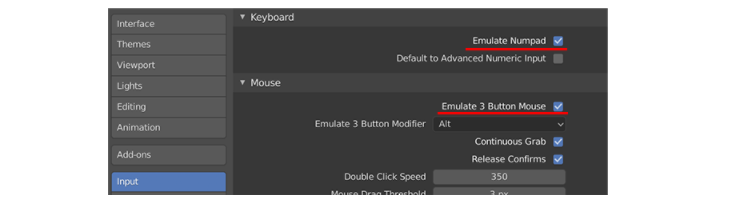
By default, alt+LMB will be registered as MMB. If you emulate the numpad, you can access the numpad hotkeys by pressing numbers in the top row of the keyboard (do NOT press shift!). The emulation will override some existing hotkeys placed on the numerical row, but we don't need them anyway, so don't worry about that.
Additionally, if you've got an Apple Magic Mouse, on top of having to emulate a 3 button mouse the view controls are a bit different: 
All other controls are the same.
PART 1: Modelling
1) Prepare a texture
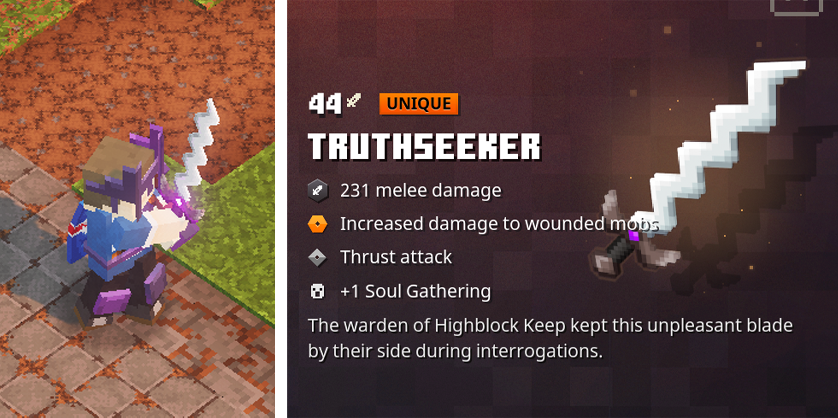
When you're finished making a texture for your item, it should look something like this:
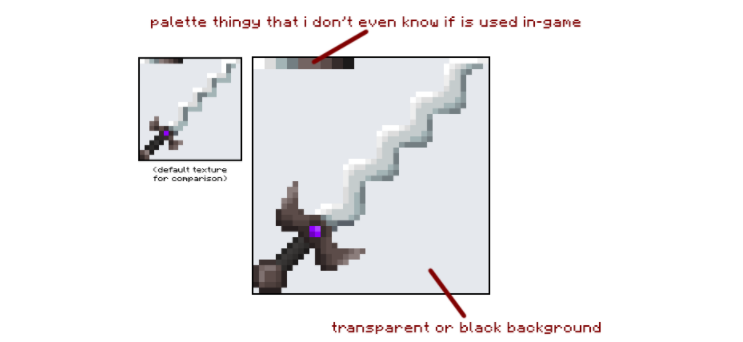
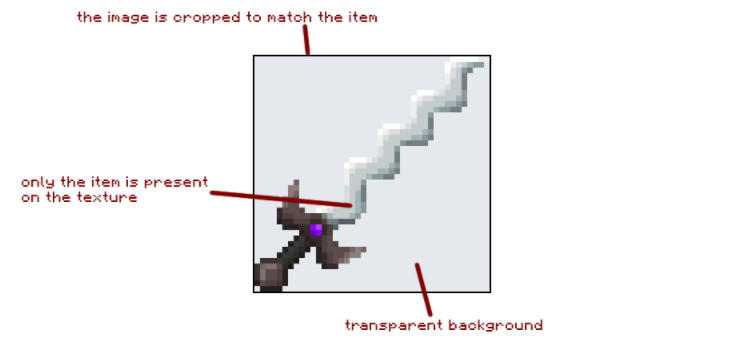
This is the texture that you want to use in your mod. For our purposes we'll need another, slightly modified texture. Make a copy of your texture and modify that. For your texture to work properly with Blockbench, you need to get rid of all the parts that you do not want to be included in the model. In this case we need to remove the palette thingy, but depending on the texture you might also need to make the background transparent etc. This is how your texture should look before importing to Blockbench:
Now with that out of the way, let's get to modelling itself!
2) Extrude texture in Blockbench
Upon opening Blockbench you should get to this screen:
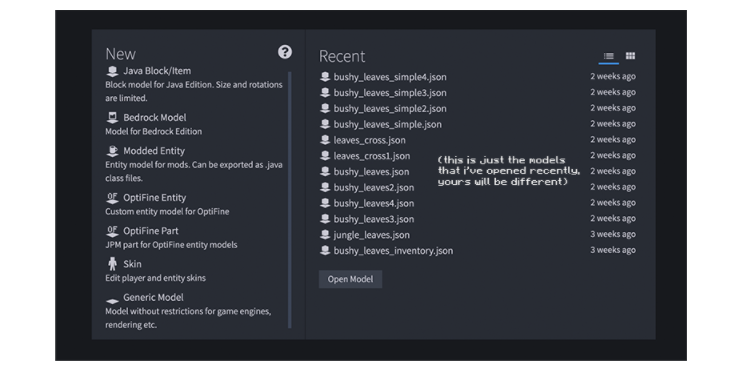
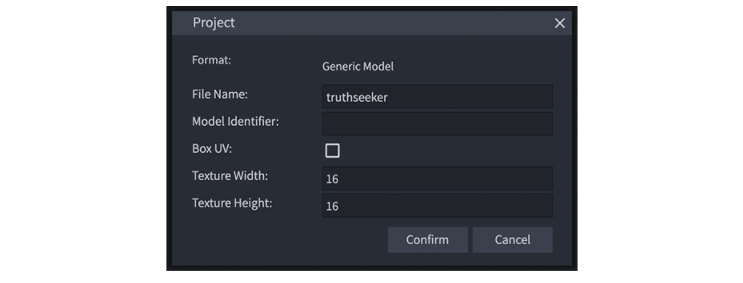
Make a new generic model and name it whatever you want. DO NOT change the texture dimensions in the window that pops up, it will break things!
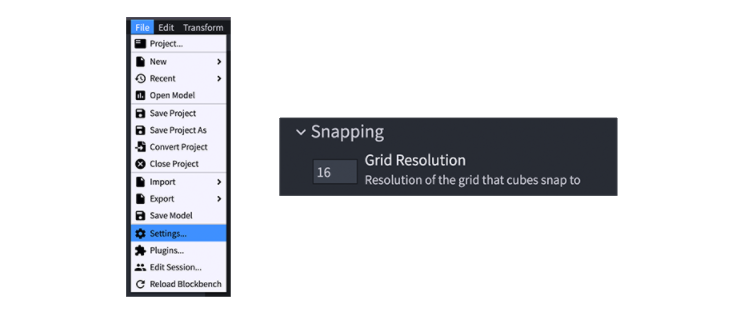
Before importing the texture, make sure that your snapping grid resolution is 16x16. You can do that by going to File > Settings... and then the Snapping tab.
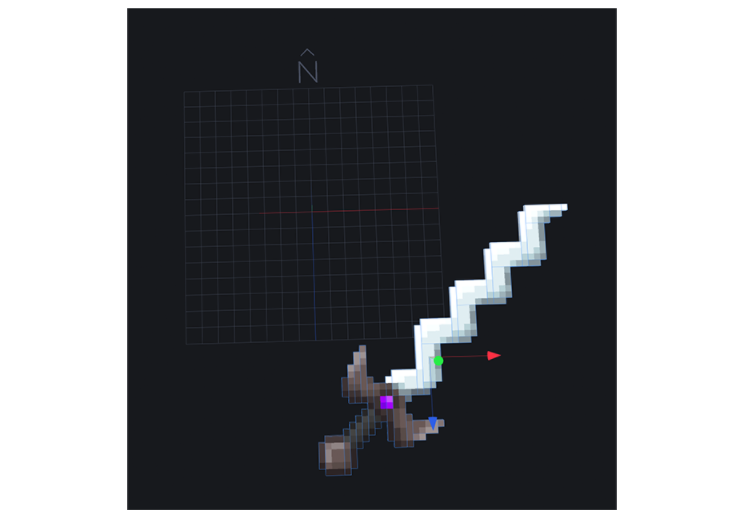
Now go to File > Import and select Extrude Texture. Do not change anything in the window that pops up. You should get something like this:
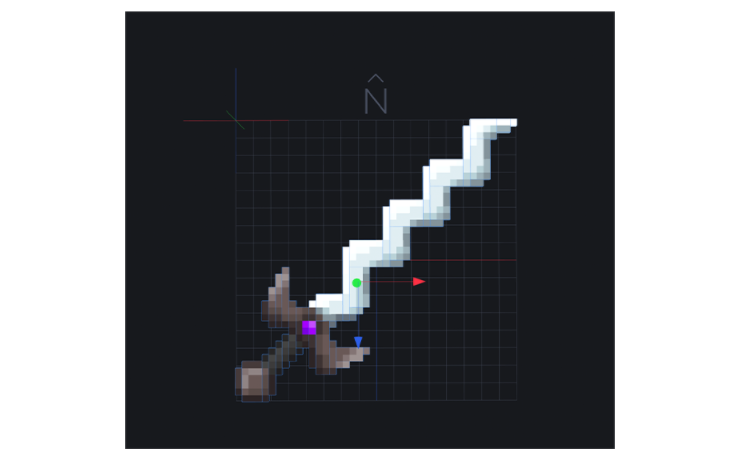
Now move the model so that it's centered on the grid.
Finally, right click on the texture under the Textures tab, and then change the file to your original, unmodified texture.
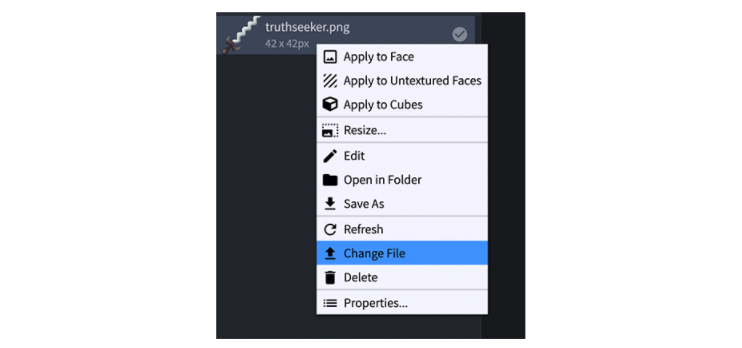
If you done that correctly, you shouldn't see a visual change.
3) Export the model as OBJ
You can do that by going to File > Export and then selecting Export OBJ Model.
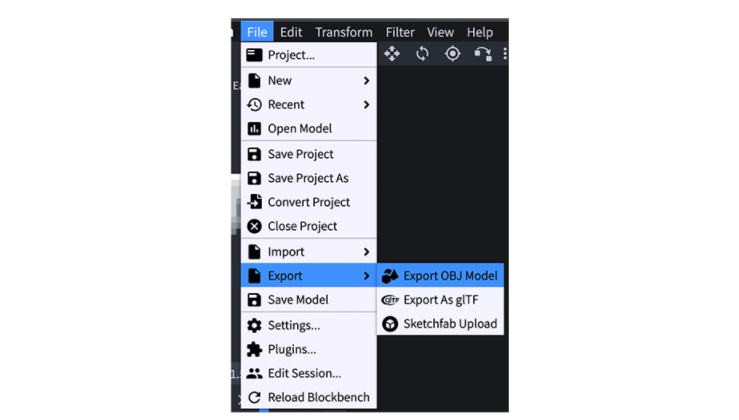 Save the OBJ file somewhere you can find it - you'll need it in the next step:
 4) Import the model into Blender
Time to get our hands dirty in Blender!
Upon opening you should see small window pop up - don't change anything in there, just click away so the window disappears. Next, delete the default cube by selecting it, right clicking and selecting Delete. Now you can import your OBJ model by going to File > Import, selecting Wavefront (.obj) and then navigating to your model.

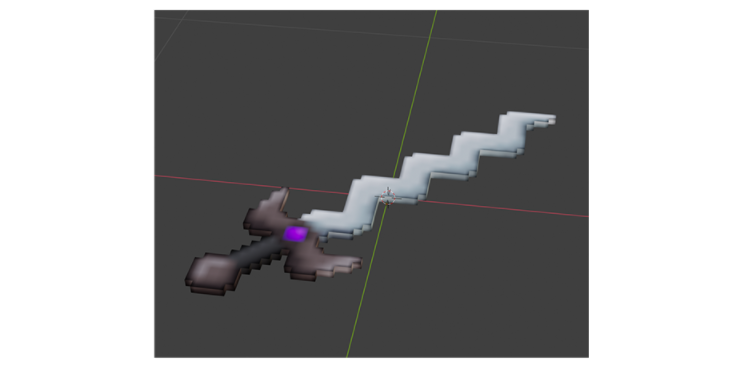
You might notice that your model doesn't show any textures - that is completely normal, it's just blender's default view mode. Switch to Material mode (top right) to see the texture.
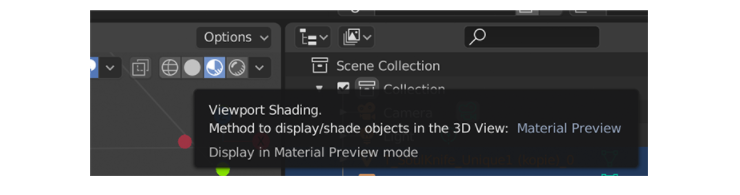
Your model should then look something like this:
Additionally, you can box select all the part of your model, shift-click on one of them and press Ctrl + J to merge all parts into one like so:
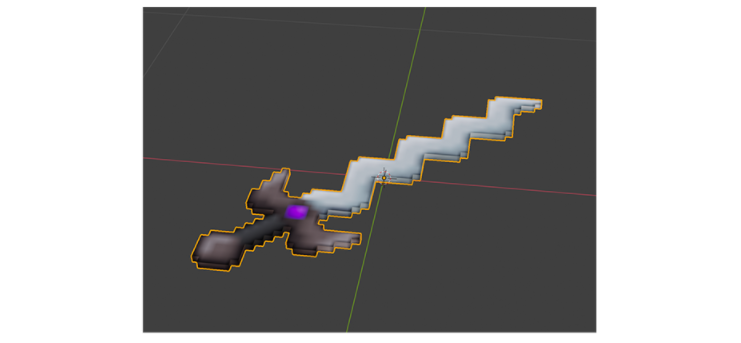
This will make it easier to edit the model all at once. We don't want the textures this blurry though! To fix that you'll need to
5) Set up a material
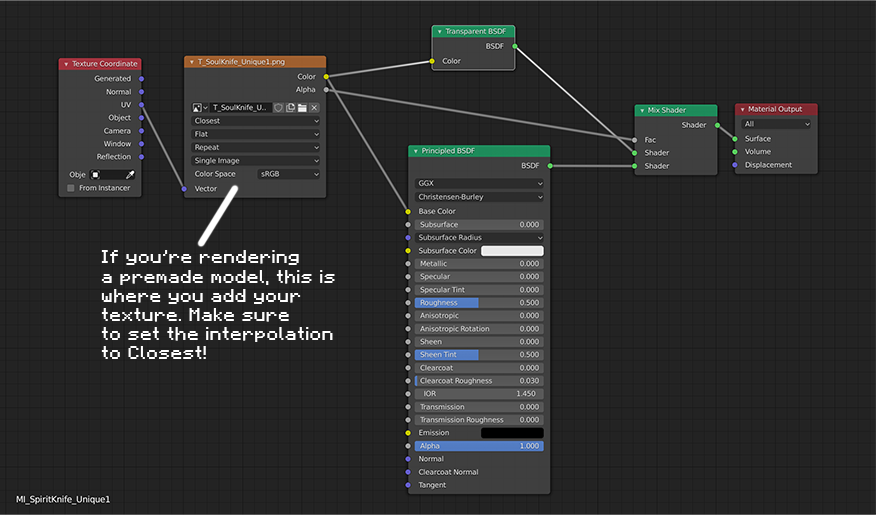
You can edit your material by clicking on the red checkered circle in the tab on the right:

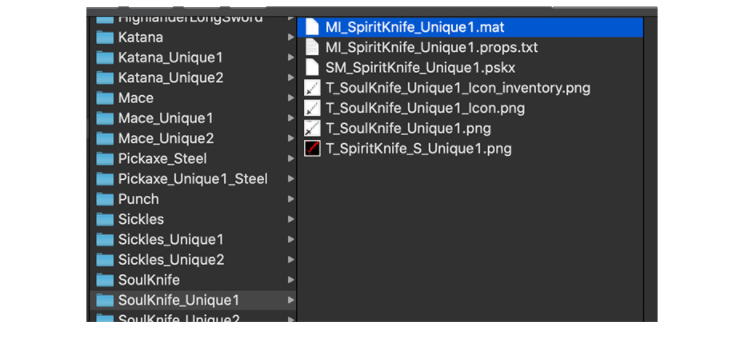
First you need to name your material correctly. Go to the location of the default texture in the Dungeons game files (assuming you've extracted them); you should see a bunch of files besides the texture. Locate the one with the .mat extension and copy its name (without the extension).
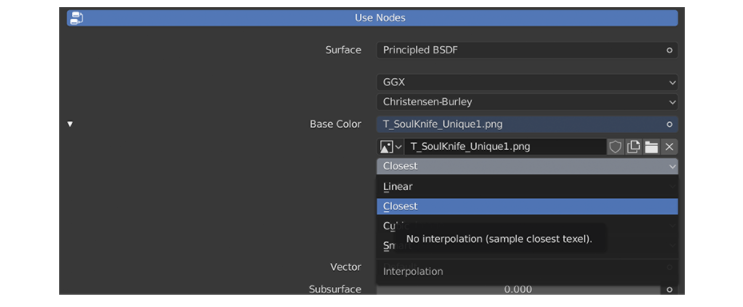
Next, copy the name into this field at the top of the Material Properties tab, and press Enter.

Now you can fix the texture filtering by going into this dropdown menu and selecting Closest.
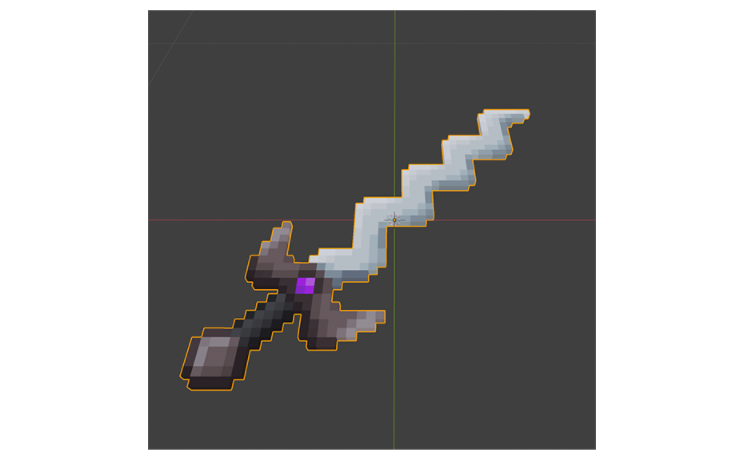
If you've done everything correctly, your model should look roughly like this:
6) Position and scale your model
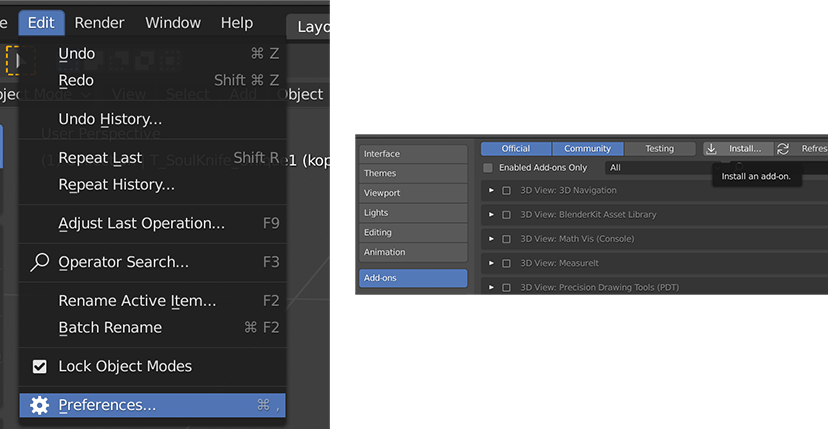
Now it's time to position your model to fit the default scale and placement. To do that we're going to use the default item model. For importing Unreal skeletal meshes into Blender we're gonna need the Import Unreal Skeletal Mesh add-on. To install it, go to Edit > Preferences, then in the window that pops up go into the Add-ons tab, click the Install button and navigate to where you saved the .py file
When you've installed the add-on, make sure it's enabled by ticking the box below in the Add-ons tab and checking if the add-on is present in the list. (if it's not, untick the box, find the add-on and enable it manually.)

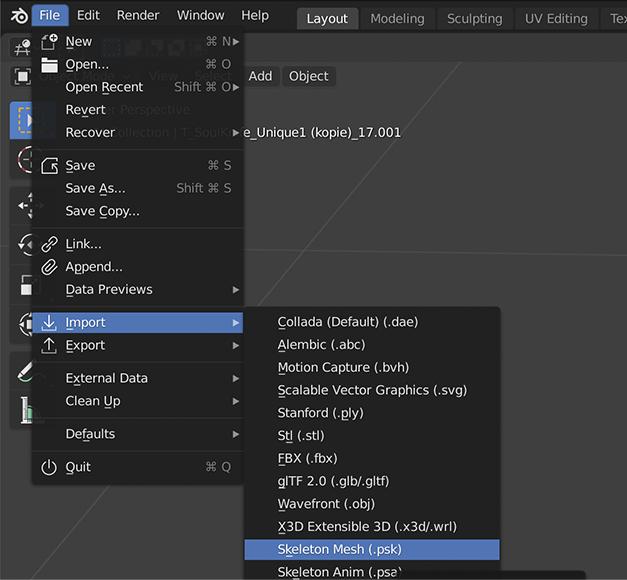
Now you can import the default model by going to File > Import, selecting Skeleton mesh (.psk) and navigating to the model.
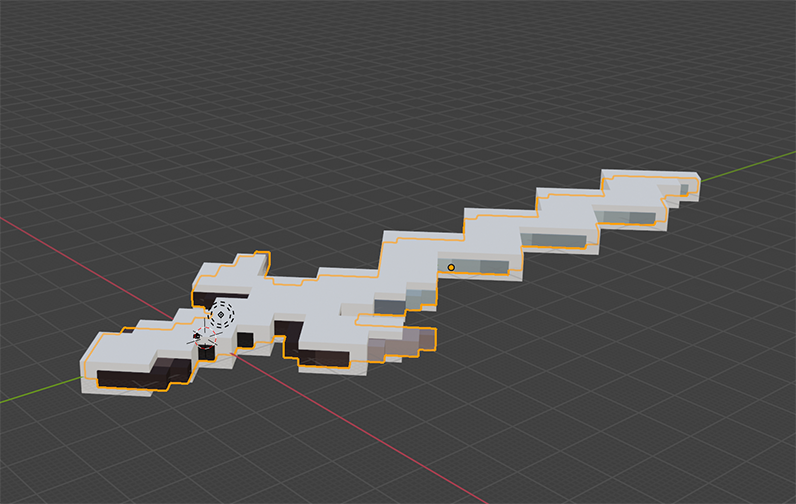
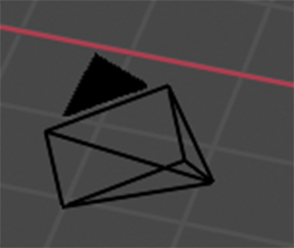
Now that you've imported the model you can scale, move and rotate your custom one to fit the default like so:
TIP: You can use a present view (like topdown) by clicking any of these points on the top right corner for more accurate positioning.
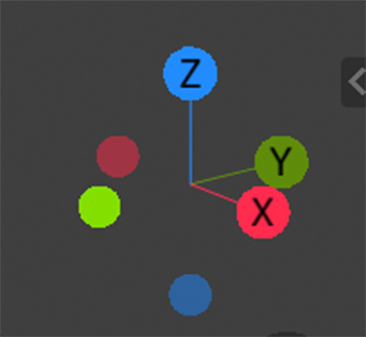
You don't have to be super precise though - just try to roughly match the position and size of the default model.
When you're finished, delete the default model by selecting it, right clicking it and selecting Delete.
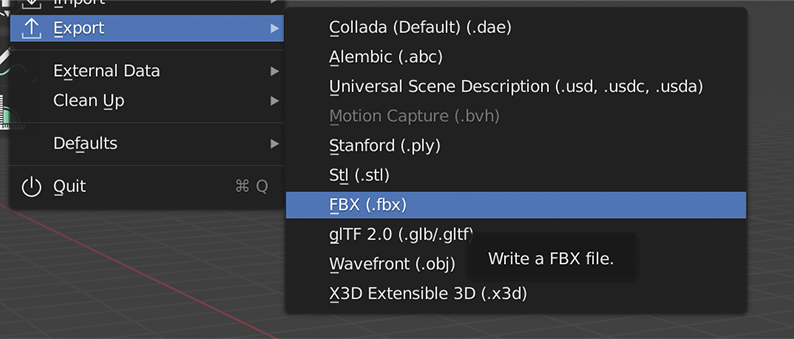
7) Export your model as FBX
You can export your model into the FBX format by going to File > Export and then selecting FBX.
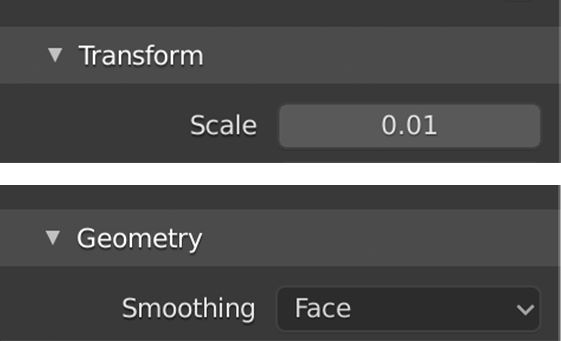
In the window that pops up you can navigate to your desired file location. That's not all though - we'll also need to change some settings in the tab on the right side. Set the scale in the Transform tab to 0.01 and then, in the Geometry tab, set Smoothing to Face.
Next, look at the model's name in the default game files and name your model that.
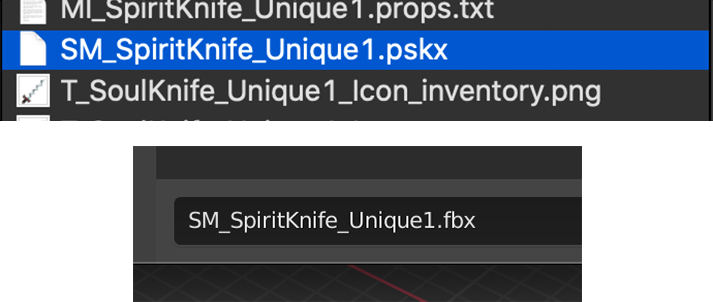
Finally, click the blue Export button to finish the process.

Congratulations! You've made it through the entire modelling process and now have a model that will function properly when put into a mod!
NOTE
This is the end of the tutorial for those of you that are making items like the apple health drop, which do not require a render. But if you're making a model of a weapon - or just need to make a render - get ready for the next part:
PART 2: Rendering
1) Import your model
if you've followed the tutorial up to this part, you can skip this step.
To import the model ripped from Minecraft: Dungeons we will need to install the Import Unreal Skeletal Mesh add-on for Blender. To do that, go to Edit > Preferences, then in the window that pops up go into the Add-ons tab, click the install button and navigate to where you saved the.py file.
When you've installed the add-on, make sure it's enabled by ticking the box below in the Add-ons tab and checking if the add-on is present in the list. (if it's not, untick the box, find the add-on and enable it manually.)
Now you can import the default model by going to File > Import, selecting Skeleton mesh (.psk) and navigating to the model.
2) Set up a material (again)
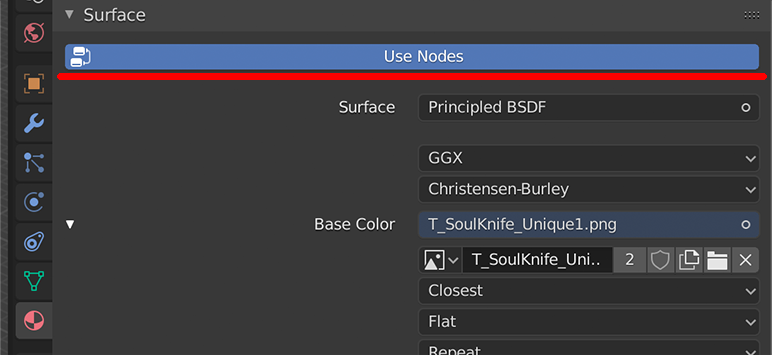
First, check if the Use Nodes button in the red checkered circle tab is blue. If it's not, click on it to make it blue.
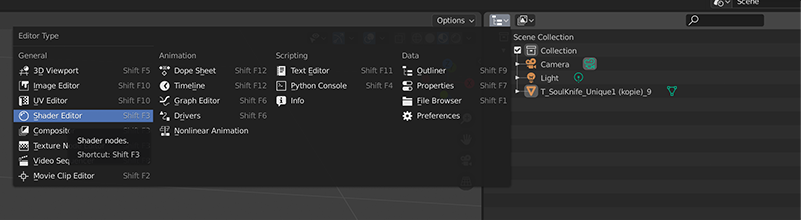
Then switch to the Shader Editor using this menu up top:
The tab should change into a node editor. Enlarge it so you can see it better and then make it look like this:
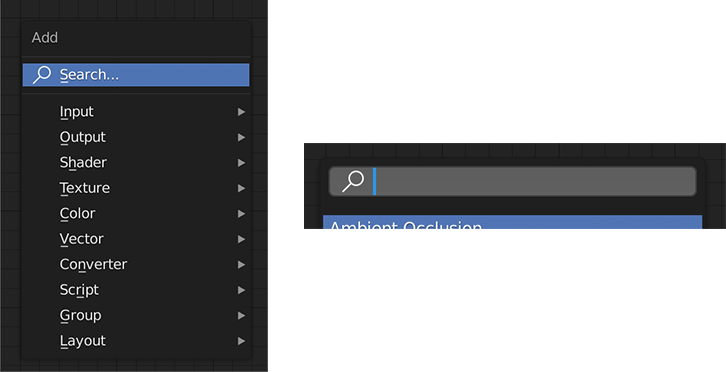
TIP: You can add a node by pressing Shift + A, selecting Search and then typing the node's name. You can also zoom in and out using Ctrl + scroll. TO connect two nodes together just click and drag from one point (as seen above) to another with your mouse.
3) Add a light
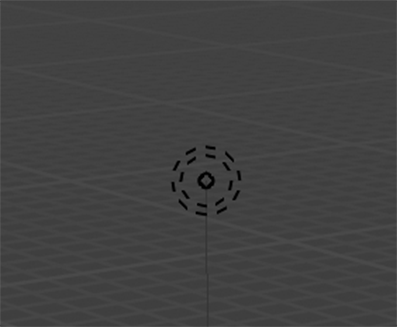
First of all, your model is probably HUGE because Minecraft: Dungeons scales it down. This can cause some issues with lightning, so make your model smaller before doing anything. Next, delete any lights that might've been added by Blender when you created the model. Just select them, right click and select Delete. They look like this:
Before adding a light, switch to Render mode (the third circle in the top right menu) to see the changes properly.

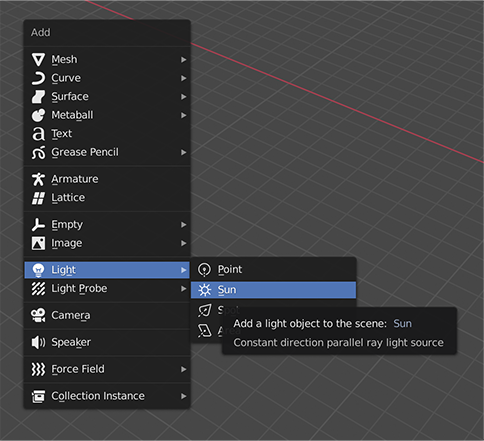
Now you can add a light by pressing Shift + A while hovering above the model view, going to Light and selecting Sun.
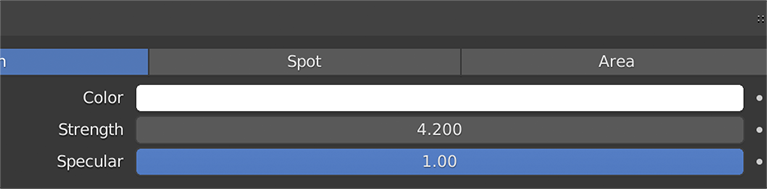
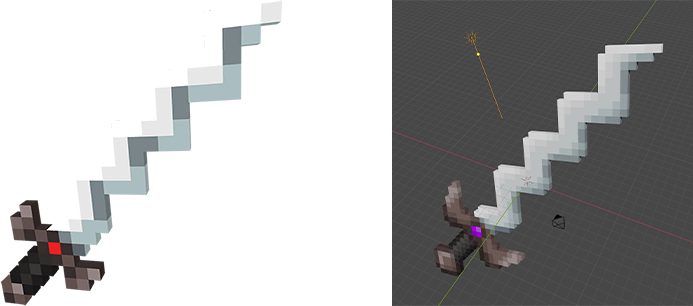
Now move and rotate the sun while trying to roughly match the lightning of the default render. You can also move and rotate the model itself to help you out. TIP: You can adjust the strength of your sun on this slider in the right-side menu while having the sun selected:
When you're done you should get something that matches the default view and lightning pretty closely:
4) Set up a camera
For Blender to actually know what to render, we need to set up a camera. First, we will enable an add-on that will make handling the camera easier. To do it, go to Edit > Preferences, open the Add-ons tab, find the add-on called "3D View: Stored views" and enable it like so:

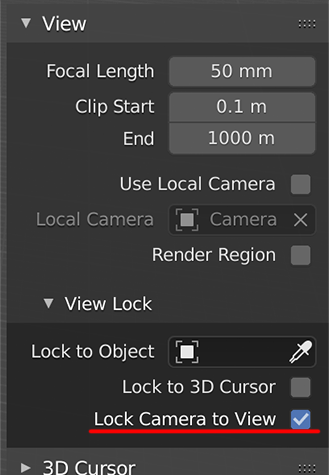
Next, click this little arrow next to the axis cross thing:
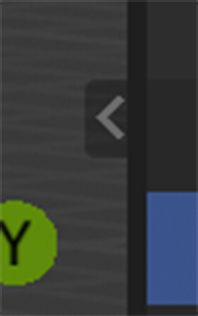
A menu should pop up. Open the View tab and check the Lock Camera to View box.
Next, select a camera that should already be placed somewhere in your project. It should look like this:
Now rotate your view around so you get a view that looks the most like the default one. After that open the Stored Views tab, click Initialize and then click Camera to View. This will move the selected camera to your viewpoint.
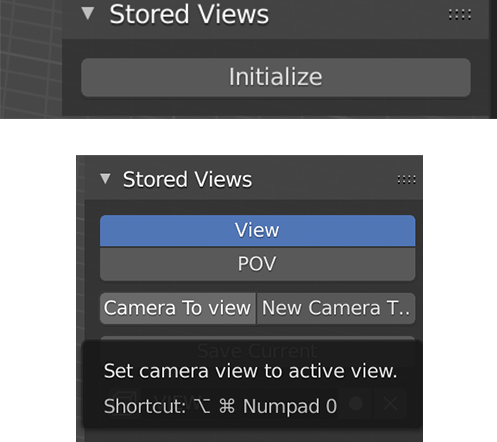
Now press Numpad 0 to switch to camera view.
5) Configure output and render
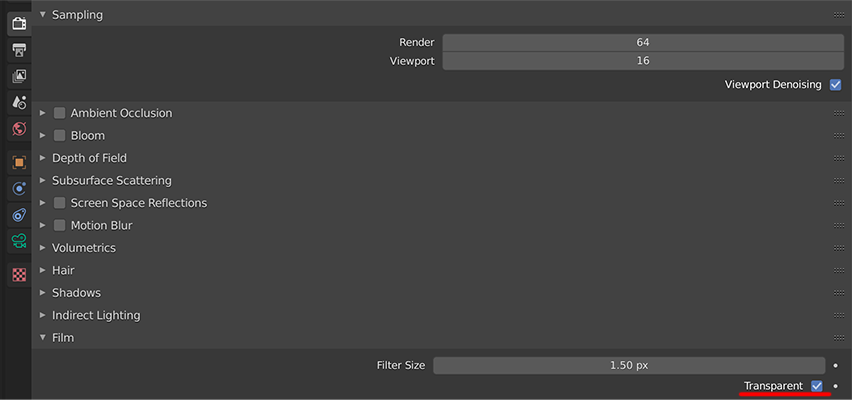
We're almost done! The only thing left to do is to configure the resolution and transparency of the output render. You can make the output transparent by going to this tab in the menu on the right side, opening the Film tab and checking the Transparent box.
For the resolution control, first get the default render and see how big it is. (There are usually 2 renders - and yes, you'll be rendering your model twice.) When you've located the resolution of the default render, go to the tab in Blender immediately below the one you just opened and set the resolution in the first two fields.
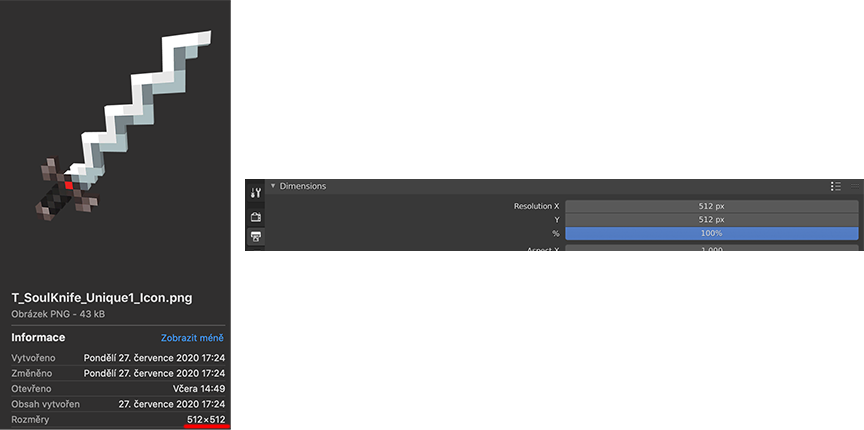
(You can then pan and zoom your view a bit so your model is roughly in the centre of the square.)
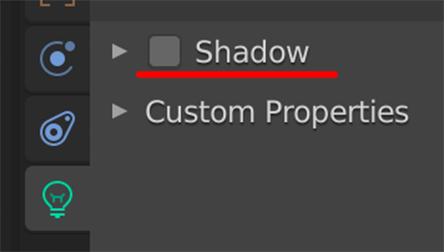
Before we get to the render itself, select your sun, go to the tab with the lightbulb and uncheck the Shadow box.
Now you can finally initiate the render by pressing F12 (fn + F12 on mac).
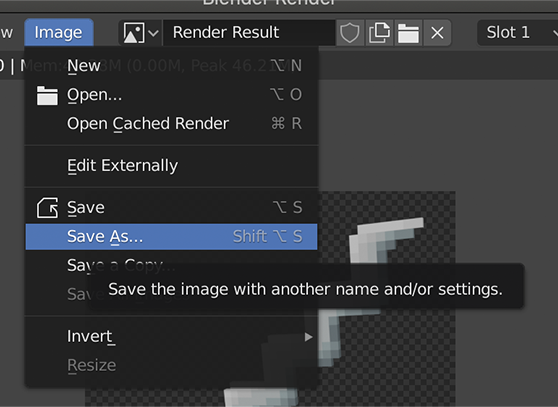
When the render is finished, you can save it by going to Image > Save as.
And there you have it! You have made yourself a model and render that is usable in Minecraft: Dungeons!
Thank you so much for reading this tutorial, and good luck with your mod!