Appearance
How to customize the loader cube from Minecraft Dungeons
Sources
All needed files for this tutorial can be found here.
Requirements
- Blender
- Python 3.8+
- And Pillow module
- Unreal Engine 4 version 4.22.x
Step by step: Blender
Huge thanks to @CCCode for creating this model
Open
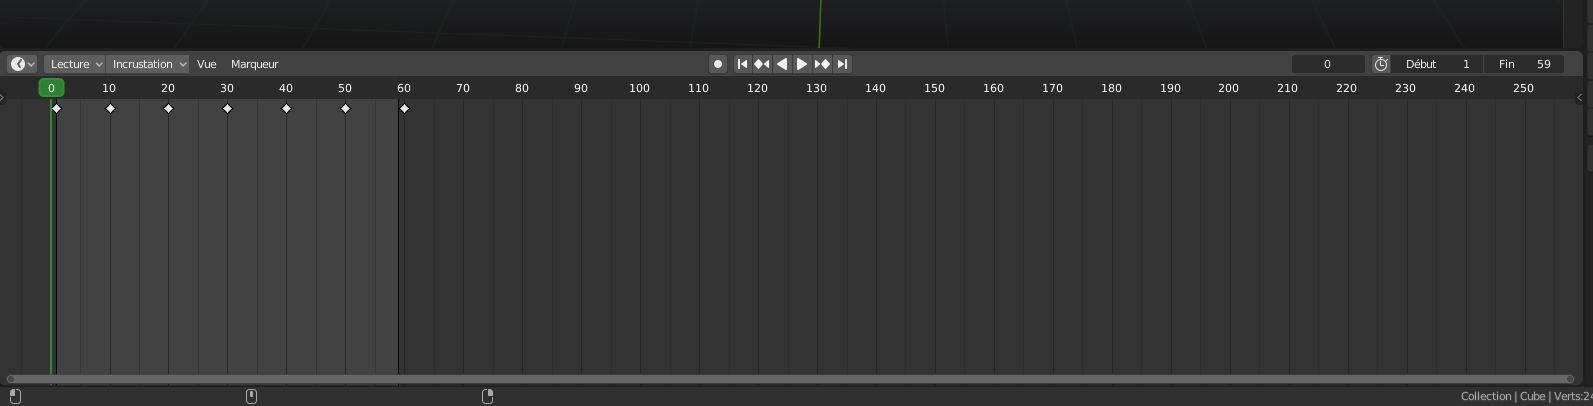
LoadingSpinnerBlock.blendwith BlenderDrag the green bar at the bottom at the beginning of the animation
Go to the
Shadingtab at the top of the screen
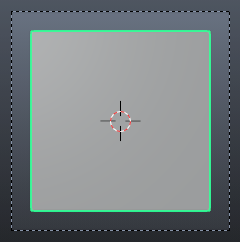
Click on the blank face of the block in front of you (you get a green outline surrounding it)
In the bottom slide, in the orange area, click on the cross and import a new texture: A.

B.
C.
Drag the green slider until a new face
- Redo the previous step and this one until all faces are done
⚠️ The second side of the animation has 2 orange tabs. This is because the animation file uses a non-euclidean cube, so there are 2 textures for 1 face.
- Optional: You can go to the
Texture Painttab and press the space bar to see your texture on the model.
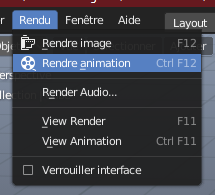
Return to the
Layouttab, and in the bottom right, change the output path.
Finally: at the top left, click on render, then render the animation, all screenshots should be in where you set the output path.
Step by step: Python
Install Pillow:
As said before, you will need the Pillow module. To install it (if you haven't already done so):
Press
Windows+Rthen typecmdthenenterType
pip install pillowthen pressenter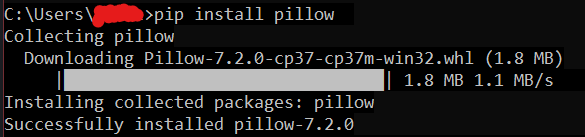
Once you have installed Python and Pillow and you have all the screenshots (with the right name), you can simply double click the
Merge.pyscript to get the texture atlas.
WARNING
The script needs to be in the same file as screenshots taken by Blender.
Step by step: Unreal Engine 4
You need to put the
loader.pngfile in this folder:UE4Project\Content\UI\Materials\LoadingScreens\MiscOpen your
Dungeons.uprojectfromUE4Project/Find the file in your project and open it:

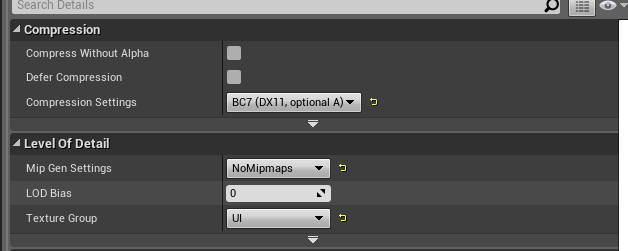
Then, you have to change settings on the right tab:
- Compression Settings → BC7
- Mip Gen Settings → NoMipmaps
- Texture Group → UI